
Back to Top
What you need to know about LED Downlights
December 14, 2020
LED downlights have become the most common form of lighting in both homes and commercial installations. These can easily be sourced from numerous suppliers for under $10 and installation costs can be as low as $15 for replacing halogen lights, or between $20 and $35 for new installations. Builders can charge as high as $150 per fitting, and installed, so when installing downlights for a complete home, the savings can be high if you plan carefully.
In addition to the high cost, builders don’t always install the best or most appropriate options. They will often compromise the quality of the light to save a few dollars and do not offer selections that can change the lighting effect which can make your home ideal and set according to your preferences.
Good lighting in your home is an investment and therefore it is important to have a good understanding of all factors that should be considered.
This article will help you understand what choices are available, how to determine the quality of the fitting as well as tips for selecting and installing.
HOW TO COMPARE AND GET BETTER QUALITY DOWNLIGHTS:
1. LUMENS:
You are paying for light (Lumens), not Watts, so be careful not to select a downlight just by wattage. Although this is an indication, more efficient and better quality lights will have higher lumens/Watt that reduce your power usage. NB: Look for the output Lumens. Some suppliers and packaging will be misleading and will supply the LED chip lumens and not the actual output lumens. The output lumens will be about 15% less but sometimes even as much as half. If you are not sure from the packaging, do a comparison.
2. DIMMING:
Check that the downlights are dimmable. Most downlights are dimmable although the actual dimmer switch can affect the amount they dim. Some downlights do not dim as well as others and can also flicker on lower settings. Dimming can be very useful in creating the correct mood and reducing glare but, just as important, will save energy usage and often increase life span. When a downlight is dimmed, it saves power according to the level to which it is dimmed, unlike the old halogen globes that did not offer savings when dimmed.
3. LIGHT COLOUR:
The next critical selection is the Light Output Colour. Most downlights are now offered with a 3-colour switch, enabling you to select the light colour that suits you best. Cheaper downlights do not give you this option and if you are not happy with the colour chosen, you would need to purchase a new downlight. The 3 colours selected are also important: Warm White (3000k), Natural White (4000-4500k) and Cool White (5000-6000k) are the most common.
- It is always important to check the Kelvin (k) value as some suppliers call 4000-4500k Cool White and 5000-6000k as Daylight or Bright White. This varies by manufacturer.
- Warm White is soft and relaxing and is the preference of most hotels.
- Natural White offers a cleaner light with less yellow; it is becoming the most common and popular choice in homes.
- Cool White is preferred in a Work or Office environment. There has also been a trend to moving away from 6000k to 5000k, which is more comfortable on the eyes and has less harmful blue light yet is still bright and vibrant.
- I would recommend purchasing an LED downlights that has a 3-colour switch with settings of 3000k, 4000k and 5000k. This should give you the best range and selection.
- There are also a variety of Smart Downlights that enable you to change and choose the exact colour temperature (k) between 2700k and 5700k, with dimming options that I will cover later.
4. CRI, LIGHT QUALITY:
Not all LED chips are the same. The Kelvin temperature given is an average value, so 2 different LED lights both on 3000k, 4000k or 5000k can look very different. It is hard to see this on the packaging so doing a comparison is a good idea. You can also compare the CRI value - CRI means the colour-rendering index. The higher the CRI, the better the light quality. Generally a CRI value over 80% is suitable for homes and >90 for shops and displays. I have seen some downlights with the same Kelvin which have unattractive green or pink tints. This will be unappealing in any home.
5. IC-4 or IC-F:
LED Downlights are generally safer than the old halogen fittings, however they do still get hot and need to be installed according to manufacturers’ specifications. All downlights should now have IC-4 or IC-F certification - IC-4 is a higher certification. This indicates less than a 0.4mm gap, preventing any ingress of insects or materials that could add to fire risk.
With this certification and built-in drivers, downlights can now be installed with abutting insulation, which means insulation gaps in your ceiling, or canisters, to prevent blow in are not required thus making your house safer and more efficient. Do not purchase downlights that do not have this certification and do not allow builders to install these as it compromises your ceiling and insulation efficiency, and more importantly, compromises your safety.
6. CERTIFICATION & PUBLIC LIABILITY:
Unlike IC-4 and IC-F certification which, although is extremely important, is not yet essential, downlights need to comply with Australian electrical wiring regulations to allow them to be installed. Numerous fittings claim to be certified but have wiring that does not meet Australian standards. The certification may be for part of the fitting only, done through a non-registered laboratory, or even worse not be genuine. If a fire is caused by a fitting which is found to not meet the required regulation requirements, or not be fitted by a registered electrician, you could lose everything, as insurers will not accept liability in these circumstances. Check the certification carefully and check that both the supplier and electrician being used have public liability insurance.
7. CORDS & PLUGS:
All downlights, unless in a concrete slab, come with cords and sockets. Electricians install plug bases in the ceiling, one for every downlight. Do not allow downlights to be hard-wired (installed without the sockets), unless in a slab, as this will void the IC-4/F certification, as well as make it more difficult and costly to replace your downlight if it fails or if you want to change it.
8. IP-RATING
The IP rating indicates how well the light is sealed. The higher the IP rating the better sealed it is. The first digit indicates the resistance to dust and particles, the second number indicates the resistance to water. For outdoor use for areas that get rain, IP65 is required.
For under eaves and wet areas IP54 is generally suitable (your electrician will check and verify requirements).
A downlight that has a higher IP rating has the added advantage of preventing insects from getting into the fitting and affecting the appearance of the light.
9. BEAM ANGLE
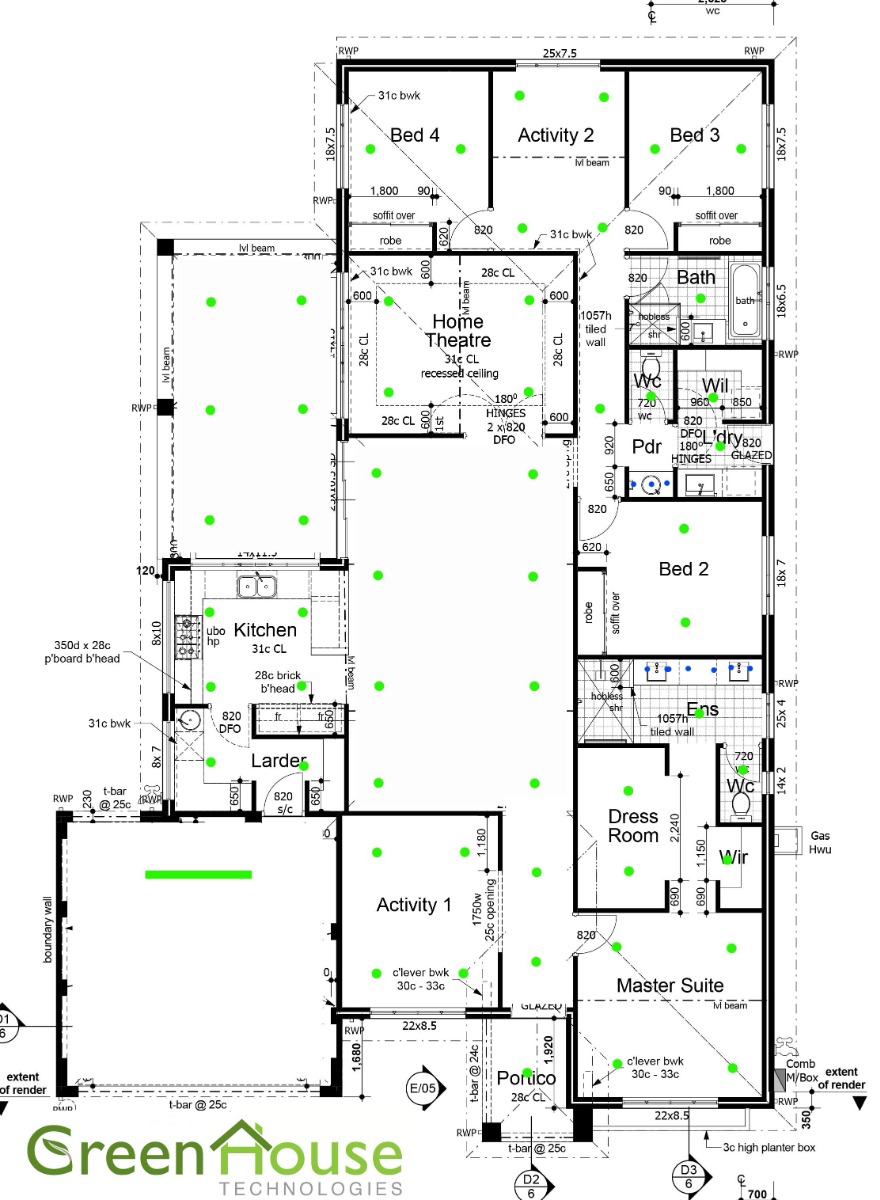
Most downlights installed now have a flat white diffuser. This gives a good, wide spread of light, covering almost 180º in some cases. They are great for adding light to a room as they provide light that reaches the walls, making rooms look brighter. If the light in a room does not reach the walls, even if the lumens are very high, the room will still look dark. This makes the lights suitable for walk-in wardrobes, if spaced far apart, or if limited quantities are used, for example, two in a bedroom. There are also disadvantages, in that due to the wide spread of light, you get a lot of glare, which can be uncomfortable, especially if there are a lot of lights in an area. They are also not ideal if using in a room with a fan.
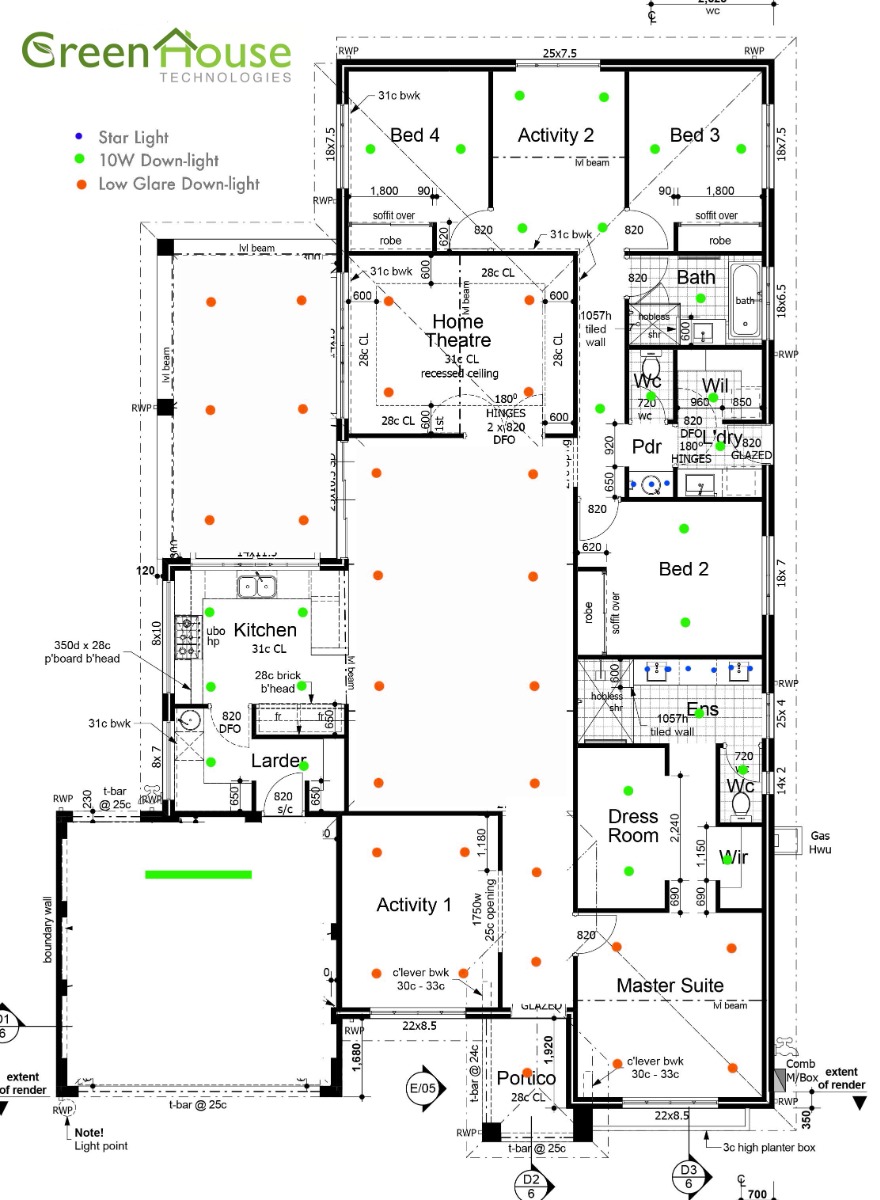
10. LOW GLARE
This has become an extremely overlooked option. With all the cheap, wide beam downlights on the market, combined with people experiencing disappointing results previously from old halogen lighting, most people are more concerned initially with supplying excessive bright. This takes away the relaxing feel and mood from a home and can produces an office-like effect. Recently Low glare lighting is making a come back, as people are now noticing the difference, and realising there are better options. These lights provide far less glare, are more comfortable, provide more mood and look nicer. The wide beam downlight is still preferable in some areas and lights can now be selected according to where and how they are being placed.
11. LIFESPAN & WARRANTY
Lifespan is an indication of how long the light will run for, indicated in hours. Most good quality downlights will have an expected lifespan of 40 000 hours. This is usually an indication of the number of hours the light will run before reaching 70% of its original brightness. The higher the lifespan is generally an indication of better quality LED chips. Some commercial LEDs can have lifespans of 120 000 hours. The downlight comprises of more than LED chips, it includes a driver and electronics as well. These can fail for a number of reasons before the projected lifespan of the LED chip.
Good quality lights will have a form of surge protection. Warranty periods can help give an indication of the reliability but with numerous small suppliers and online stores, warranties can far exceed the time businesses exist. Choose an established company, supplying brands from credible, listed Chinese companies. Not only does this ensure high quality levels, but also consistency and continuity of product, with supported warranties. Word of mouth and referrals can also assist, not only for good products and suppliers, but also indicating which ones to avoid. I see a number of brands being brought in to compare or swap and know of suppliers who have had over 50% failures within a 6-month period.
12. SMART DOWNLIGHTS
Downlights can be a very smart choice, not only can they be dimmed to save energy costs and achieve the desired mood, but also the colour temperature can be set and adjusted as required, not just to 1 of 3 settings, but anywhere from 2700k to 5700k. There are even full colour options now available. Smart lights can also include timers and alarms as well as being able to be connected to other smart devices. As with standard downlights, not all smart lights are the same and the following should be considered when purchasing.
- Ensure the colour selection is good and can match your normal (non-Smart) downlights if required.
- Ensure the dimming level is suitable and flicker-free.
- Ensure the smart lights have permanent memory. Lights that can change colour with a switch will change your carefully selected settings and adjustments, cause different lights to change colours differently and cause a lot of wasted time and frustration.
- Carefully select between WiFi and Bluetooth lights. Although WiFi lights can be good for certain applications, large quantities of WiFi lights can affect your WiFi bandwidth and its efficient functioning. Bluetooth downlights can achieve similar results with a cheap gateway added without the disadvantages, and offer other advantages, including easy set up and quick operation.
- If selecting full colour (RGB) downlights, check the colour brightness, not just the white output, as these use different LED chips and lower colour output often results as it can save manufacturing costs.
- Remember Smart lights will not function or be Smart if the light switch is off. To be completely Smart, changing the switch and light together will give full control. Smart, dimmable switches are not available yet, which could enable normal downlights to have Smart control, except these would still not have the colour temperature options.
- There is more that can go wrong with a Smart light, due to added components and electronics. Follow the lifespan and warranty tips supplied above, and also try and purchase local, where you can get backup, support and easy replacements if unsuitable.
- Ensure the brand has been tried and tested and will have continuity in the future.
13. EXCHANGEABLE
Lighting suppliers should know a lot more about downlights than you, should make recommendations, show you options and even assist with lighting layouts. At the end of the day however you still have your own personal preferences and may rather have your lighting selection over what is recommended. You may even change your mind after installing. Find a supplier that can be flexible, to reduce any risk of purchasing a product you find unsuitable, with money-back or exchange options. After all, the lights you choose should last a very long time, they could be the last lights that you change.
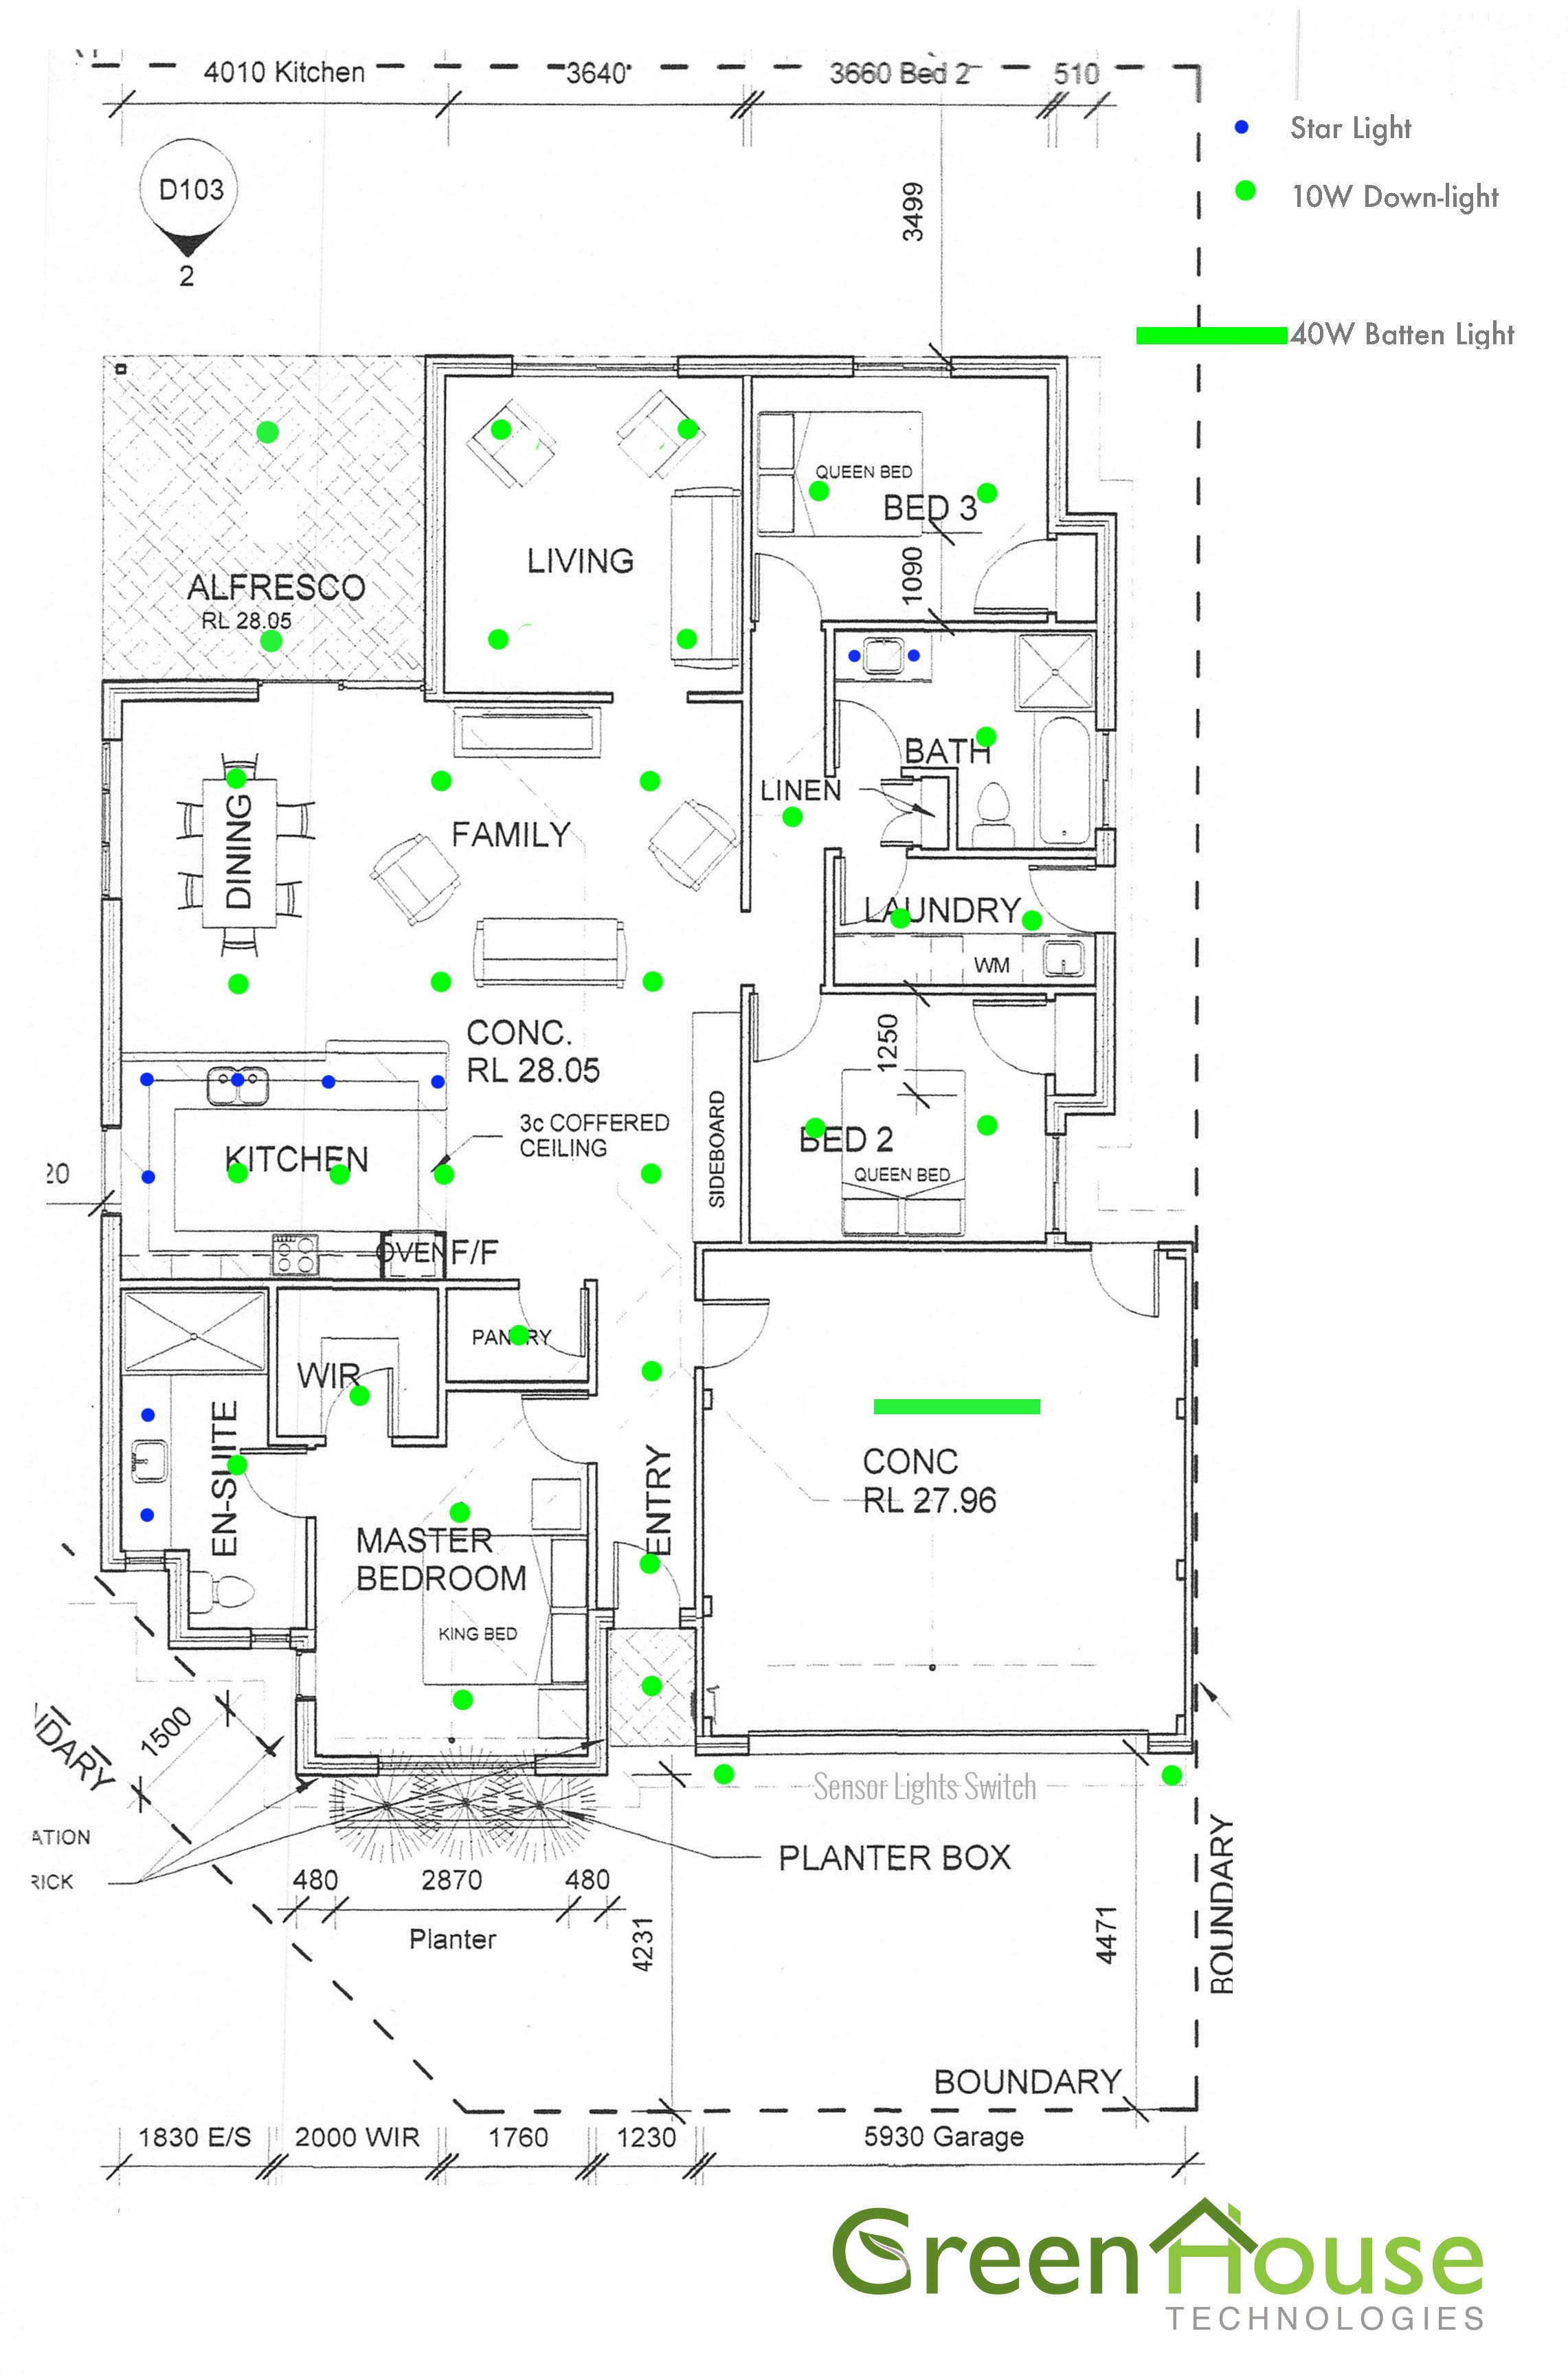
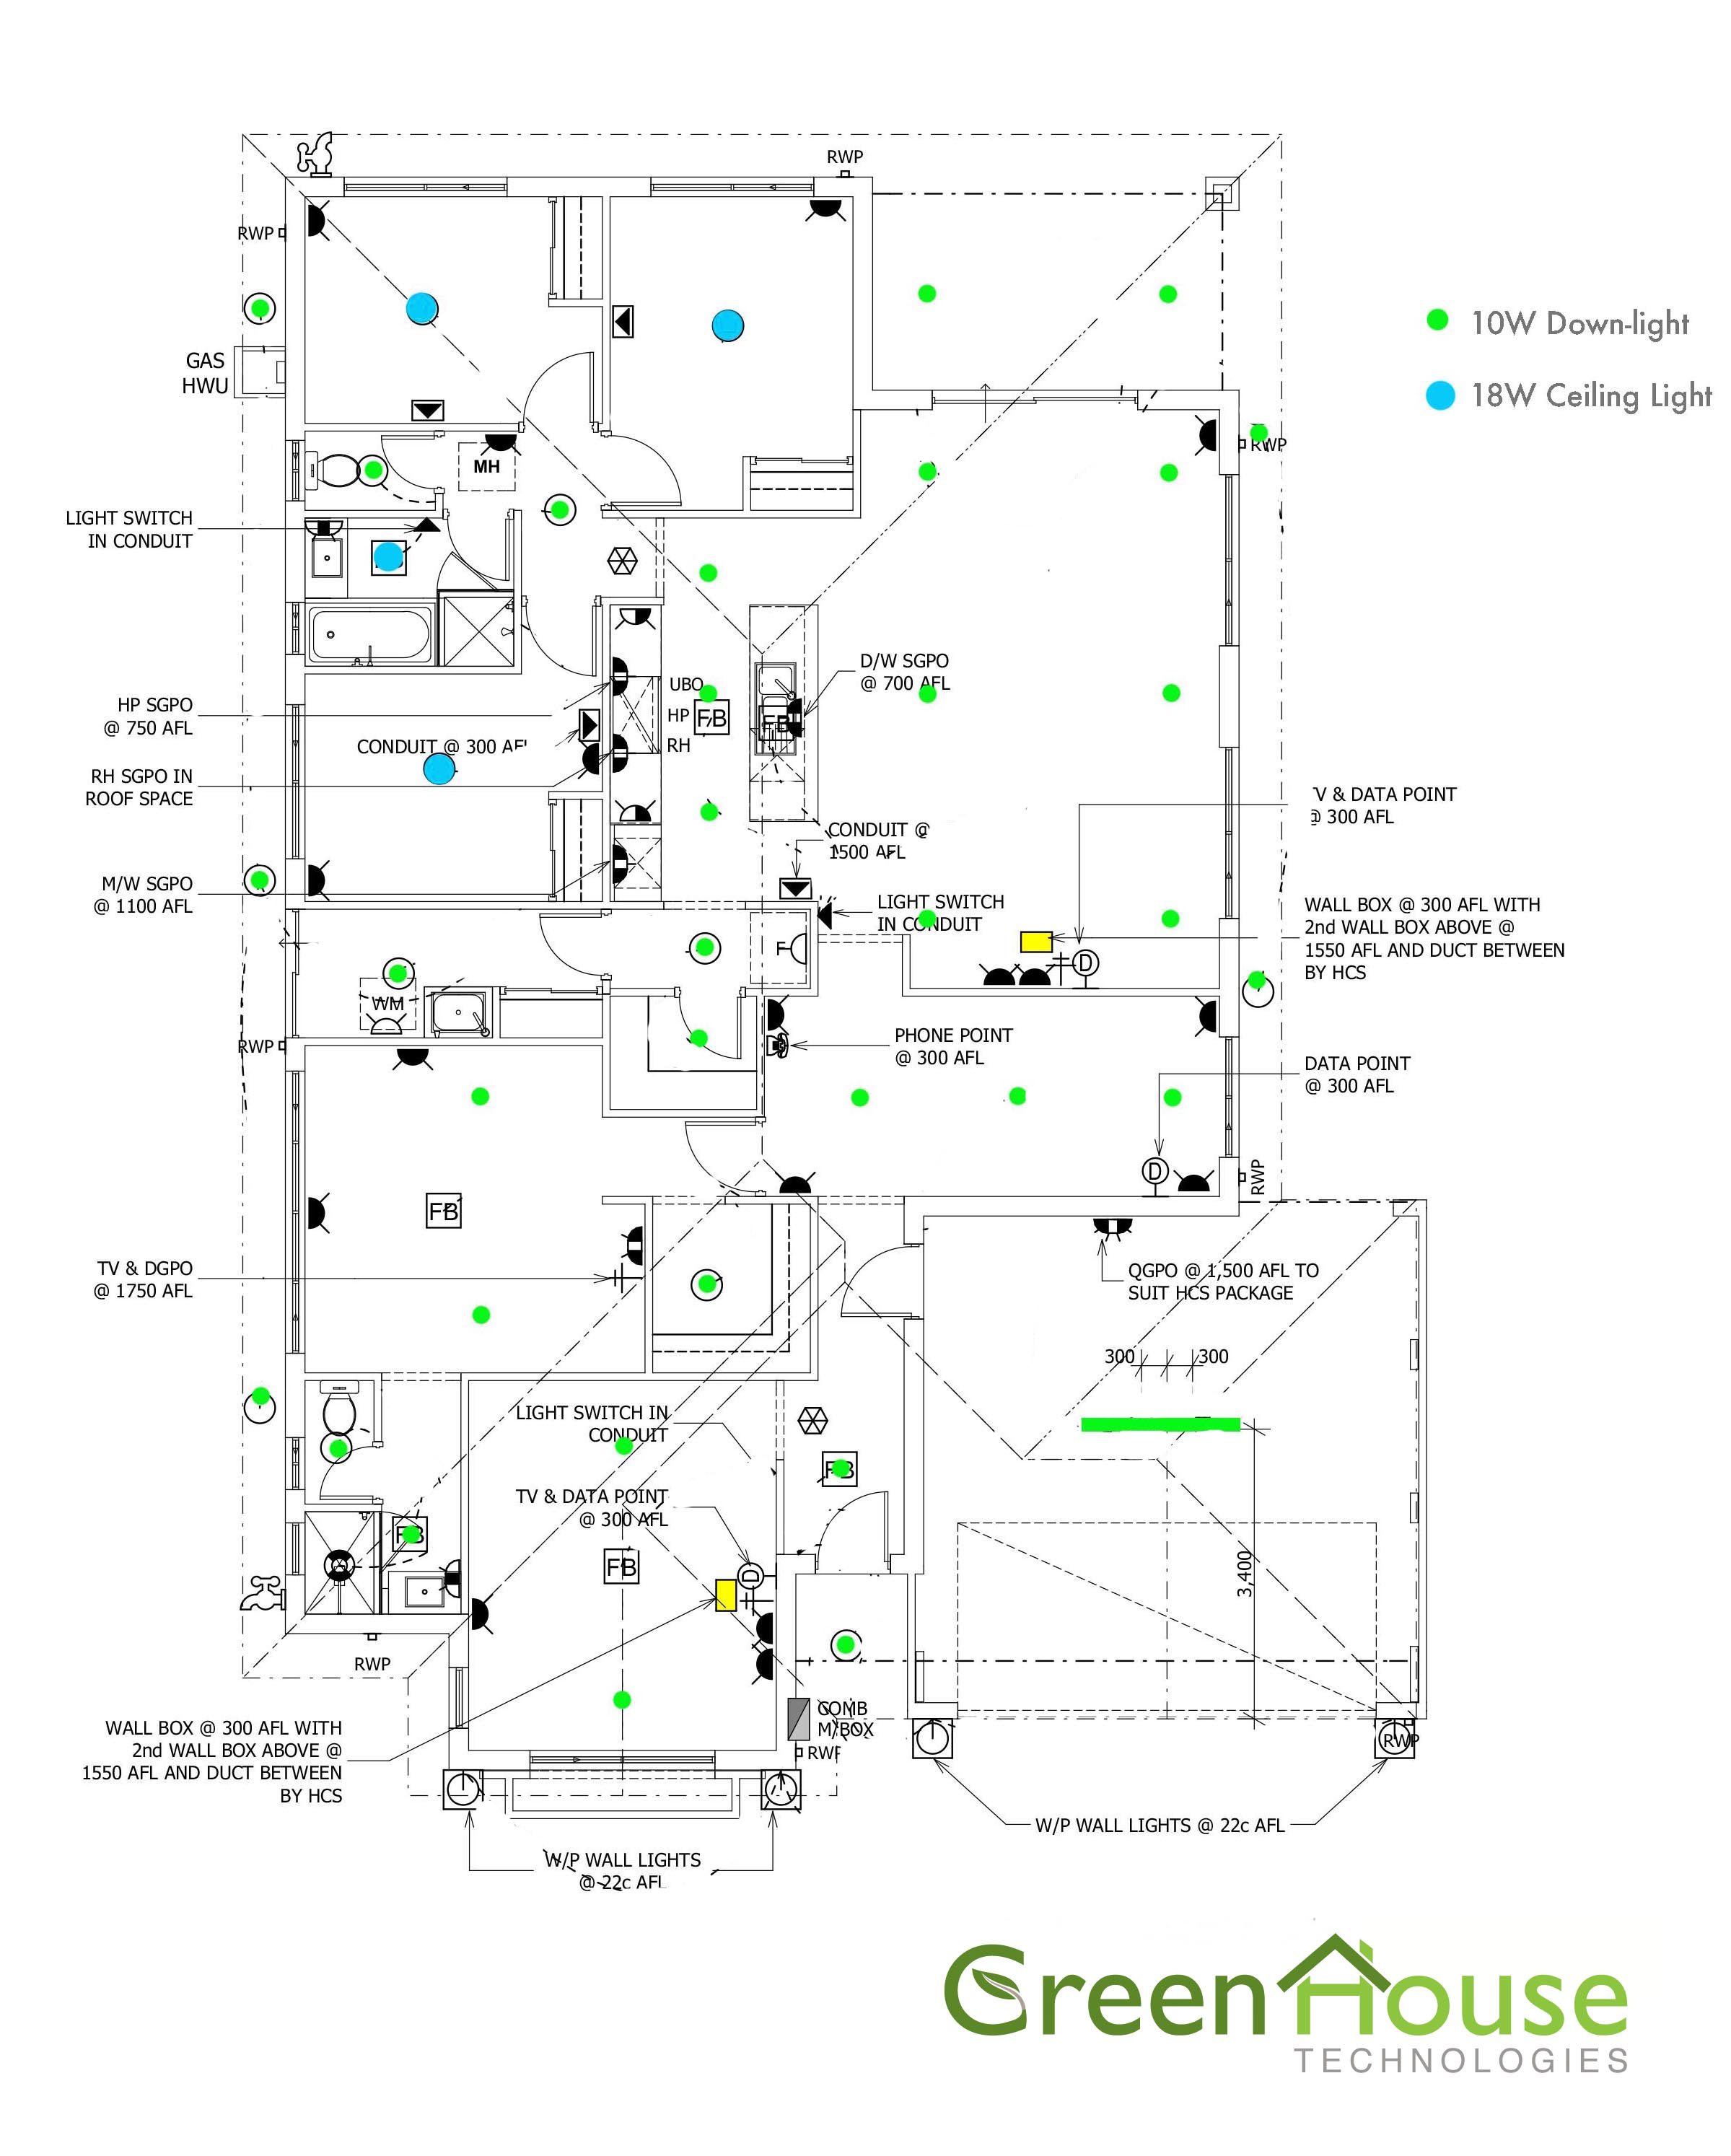
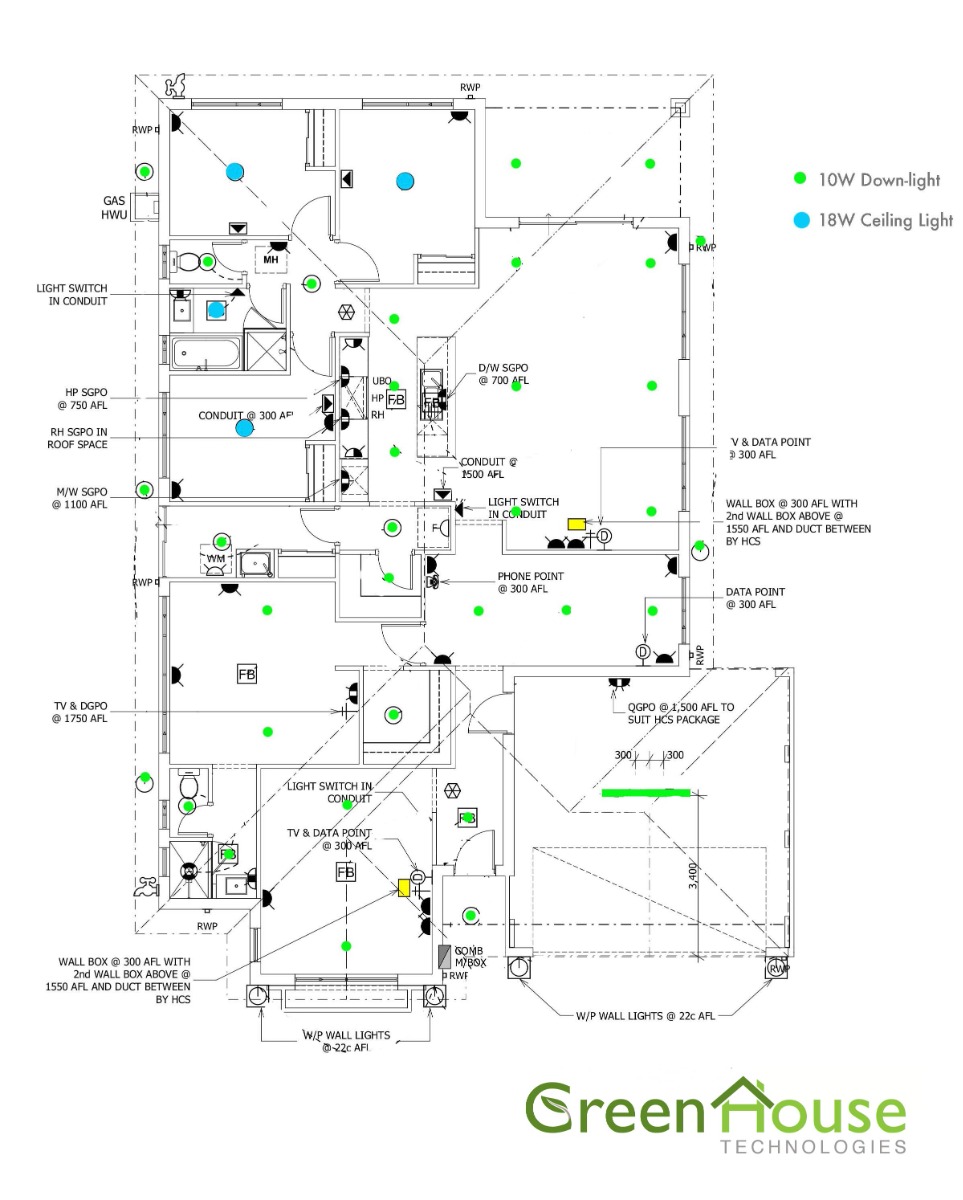
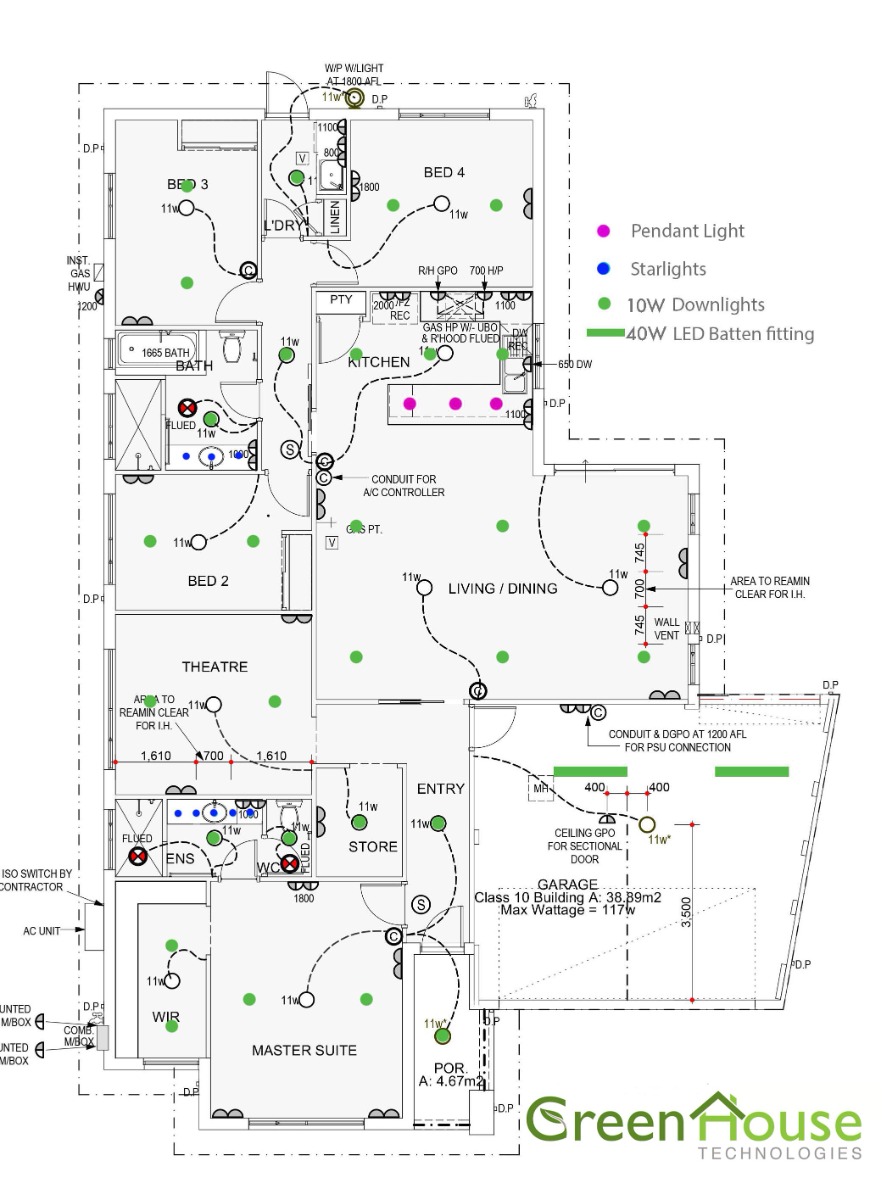
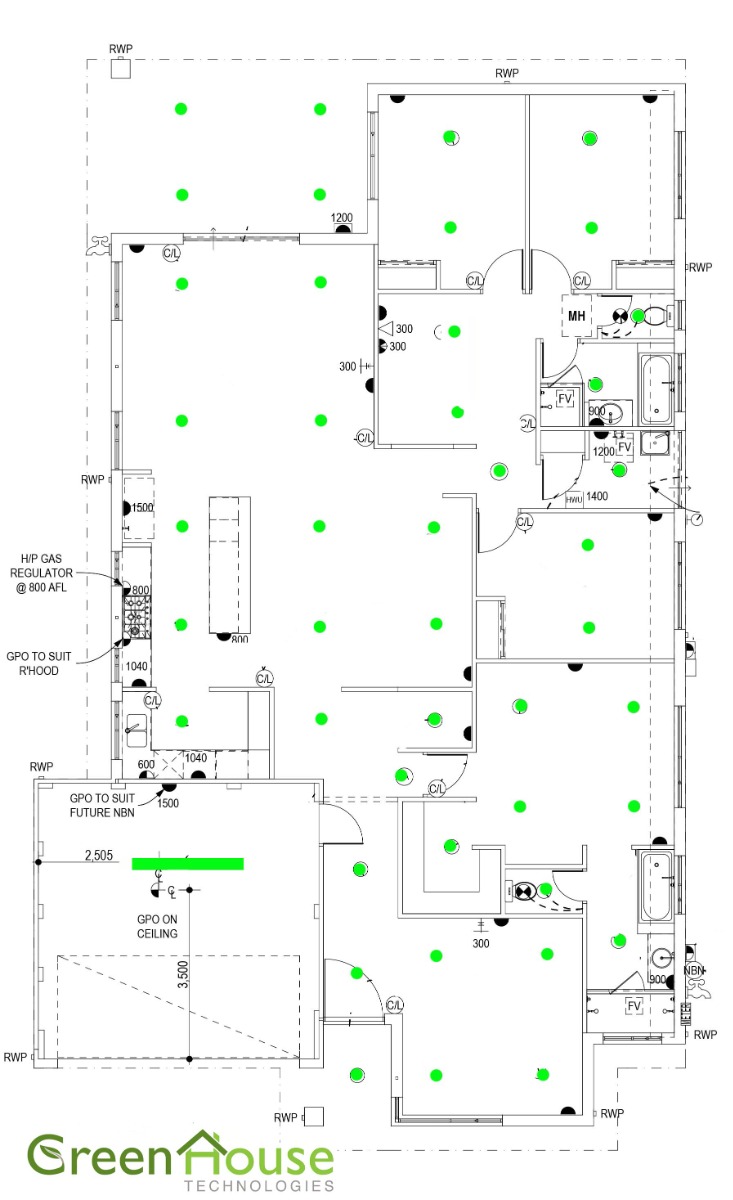
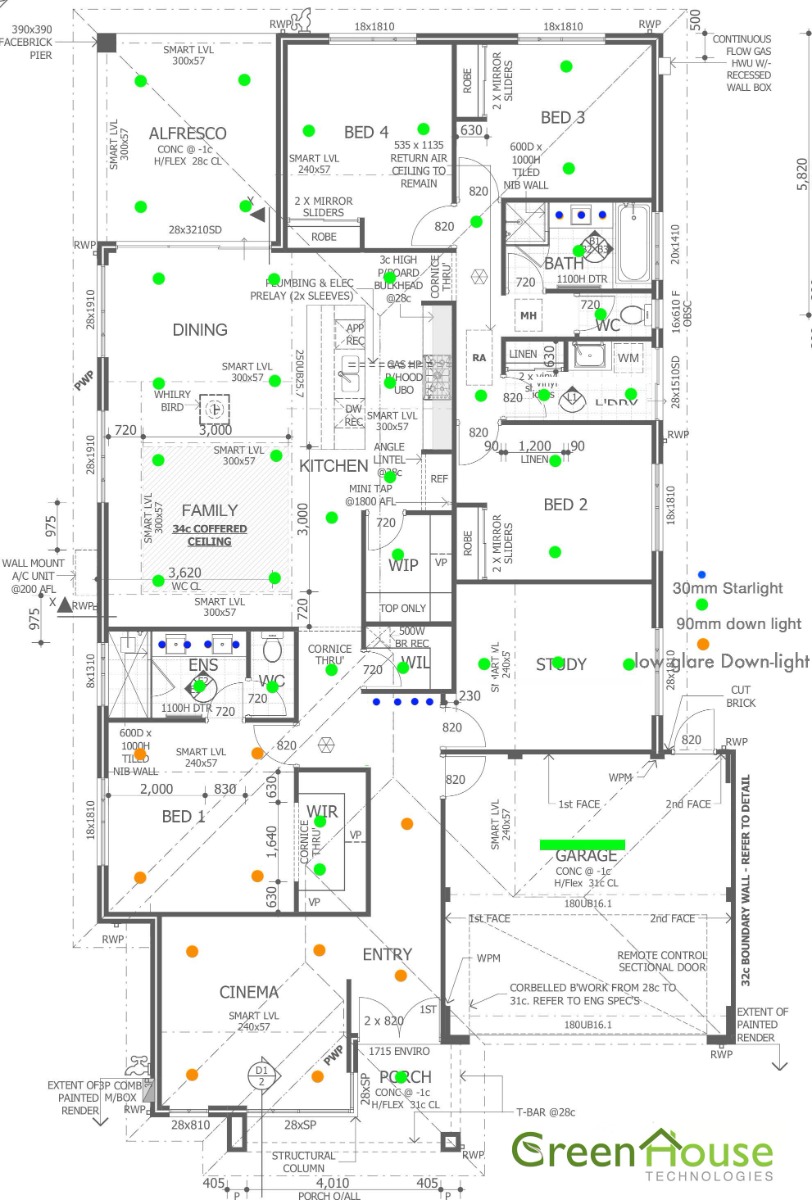
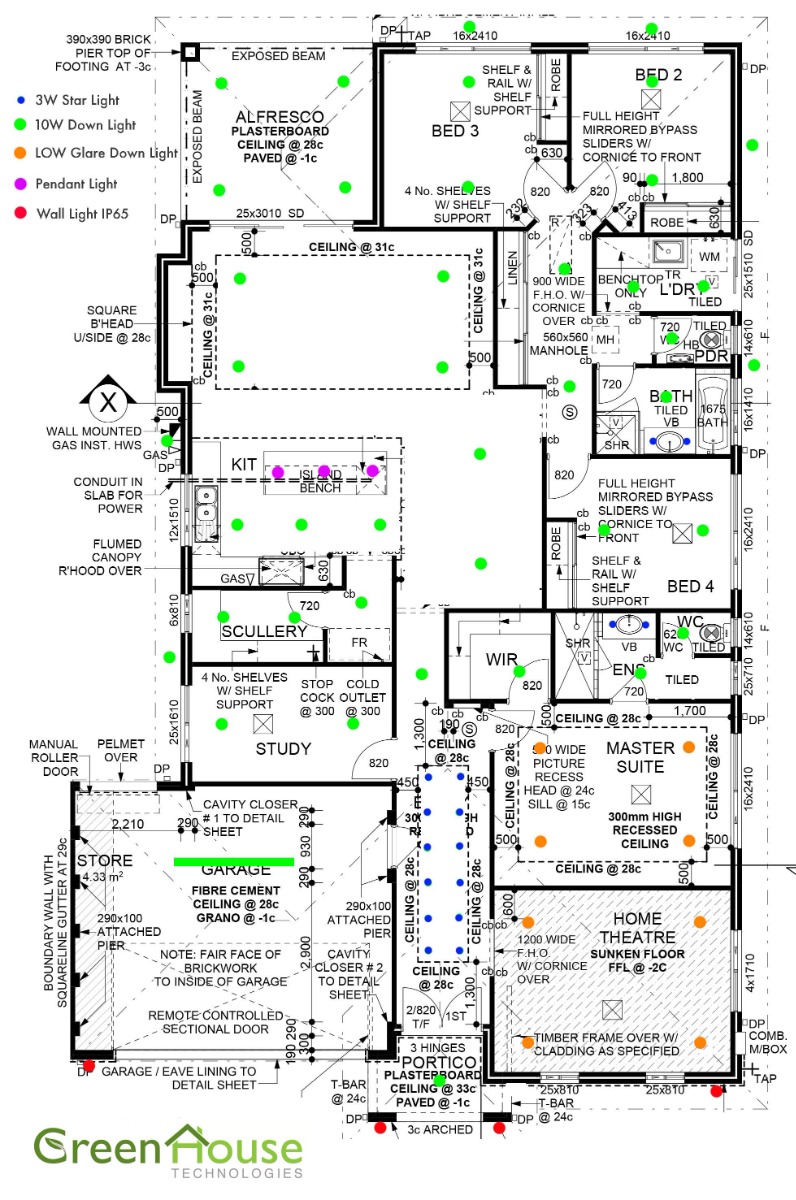
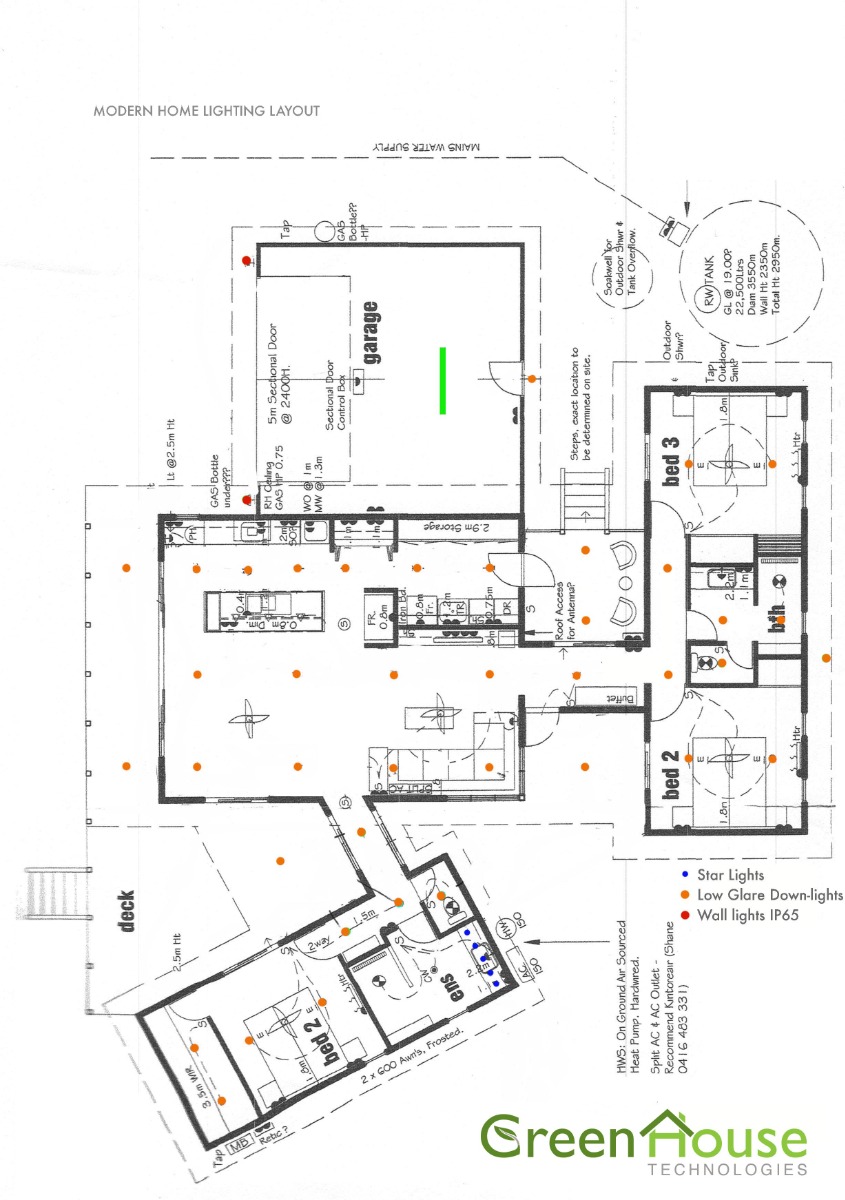
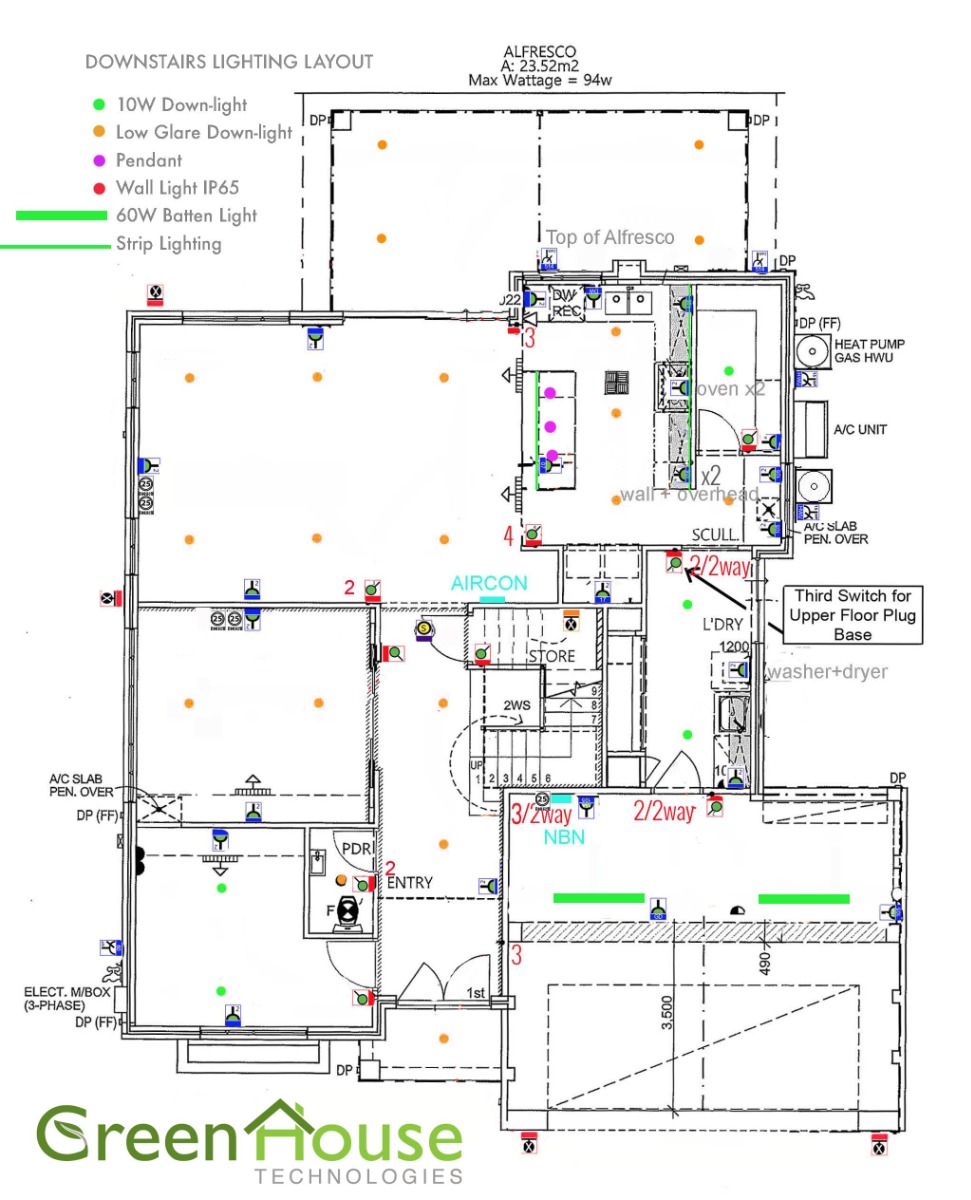
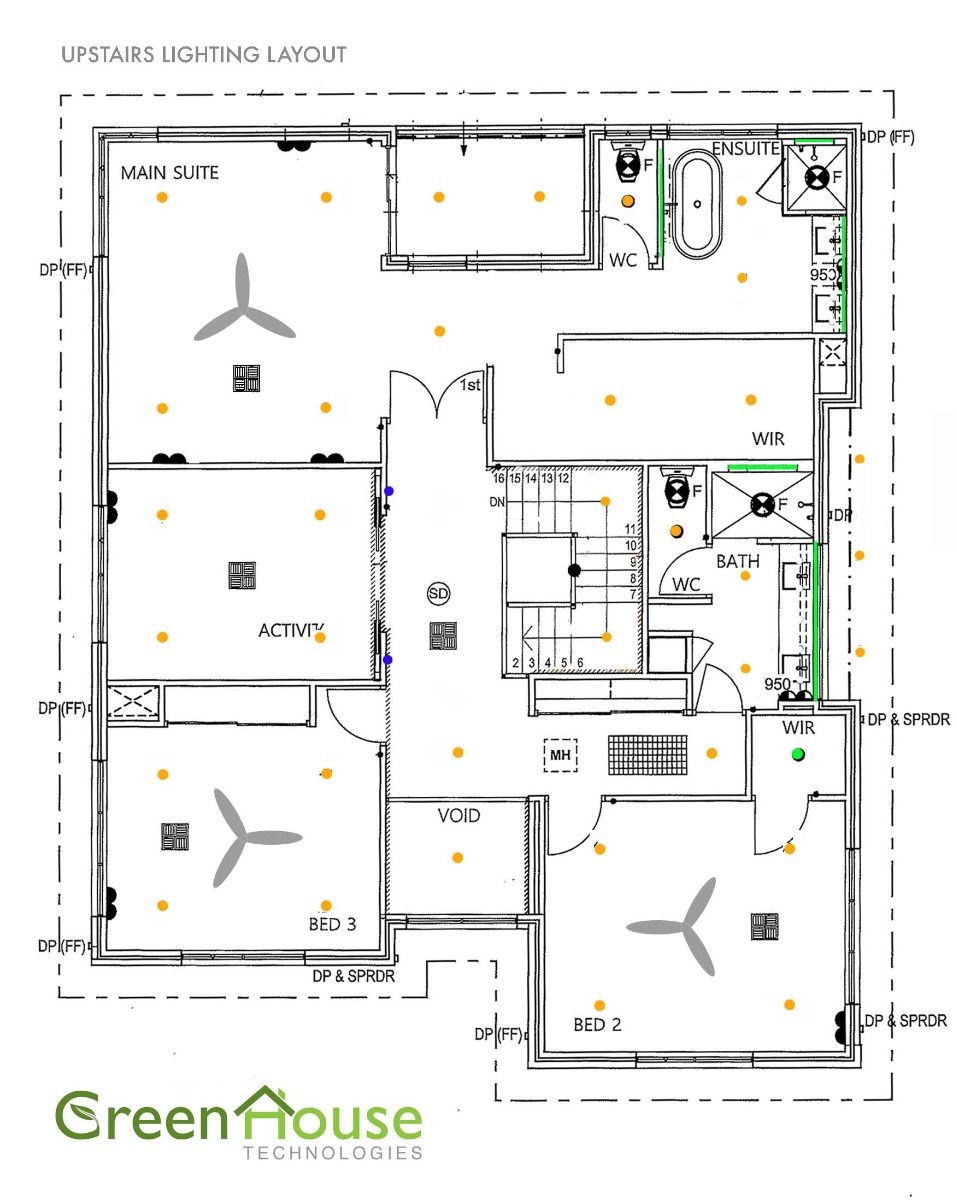
14. HOW TO POSITION:
Downlights can now be placed about 3m apart. The idea behind downlights is to spread lights evenly throughout a home, and providing a good level of light to all areas. Downlights now look neat and blend with ceilings to give a good open feeling to enhance the size of homes and the layout. It is always best to position the downlights according to the rooms, rather than the furniture within a room, giving the best option to provide balanced lighting and flexibility.
- Do not place 1 downlight in the centre of a room. The lumens are too low and light will not reach the walls. Two downlights about 600-700mm from the walls are normally suitable in small rooms, using downlights with over 900 lumens.
- For larger rooms or if symmetry is preferred, 4 downlights are commonly used. Place in the corners about 650mm from each wall. Here 60º low glare downlights are far more suitable for comfort, and will also work well with a fan in the centre of the room if required.
- In kitchens I would recommend more lights for the area than other rooms, normally at least 3 downlights to minimise shadows, and more for larger kitchens. The normal wide beam downlights are good and provide lighting over a larger area and into cupboard spaces. Low glare lights can also be used but supplementary lighting, such as strip lighting under cabinets, would help in combination with the downlights.
- For passages and living areas, the density can be far less than previously with halogen lights. Three metre spacings are generally fine. Ensure lights in these areas work together with other downlights, creating a uniform and balanced layout in all directions. Mark and check that all lights can be installed prior to making any holes and ensure beams will not affect this. Lining up and spacing lights carefully will improve the aesthetics of your home, having even 1 light out of line can be extremely unattractive.
- Bathrooms require at least 2 downlights, or 1 downlight in combination with starlights or another form of light. This will reduce shadows and make it easier to see in the mirror.
15. GREENHSE BASIC DOWNLIGHT EASY SELECTION:
DL10ES: Standard 10W Tri-colour switch adjustable downlight; Wide beam angle
DL10BT: 10W Bluetooth downlight, wide beam angle - colour temperature and brightness are adjusted on the phone
DL10PS: 10W Low Glare Tri-colour switch adjustable downlight; 60° Beam angle
DL10PBT: 10W Low Glare Bluetooth Downlight; 60° Beam angle - Colour temperature and brightness are adjusted on the phone
DL9RGB: Full-Colour and colour temperature downlight with wide beam angle - is available in WiFi or Bluetooth.
WiFi has a lower cost and does not require a Gateway to work with Alexa, Google or Home Kit. These require a WiFi Extender when connecting more than 10 devices.
Full-Colour Bluetooth is more stable and easier to install. However, it requires a Gateway to be operated with Alexa, Google or Home Kit.
16. HOW TO CHOOSE DOWN-LIGHT CHECKLIST:
☑︎ High Lumens: 10Watt should achieve 940 Lumens
☑︎ Good Dimming: At least 10%-100%, some downlights with specific dimmers can also dim to 0%
☑︎ Colour Selecting Switch: e.g. 3000k / 4000k / 5000k
☑︎ Good Light Colour: At least a CRI of 80 or above
☑︎ IC-4 or IC-F: Certification (essential, not an option)
☑︎ Certification & Public Liability: Does the supplier have you covered
☑︎ Cords & Plugs: For quick installation, safety and replacement
☑︎ High IP rating: For wet areas or under eaves, IP65 and IP54 options are available
☑︎ Beam angle: Does this suit the area and room
☑︎ Low glare: Are you ensuring suitable comfort levels, or using with fans
☑︎ Lifespan & warranty: Ensure at least 40 000 hours, with 4 year Warranty
☑︎ Smart downlights: Can be less expensive than adding dimmers, improving comfort and energy savings
☑︎ Exchangeable: Can you change your mind if the lights are not suitable